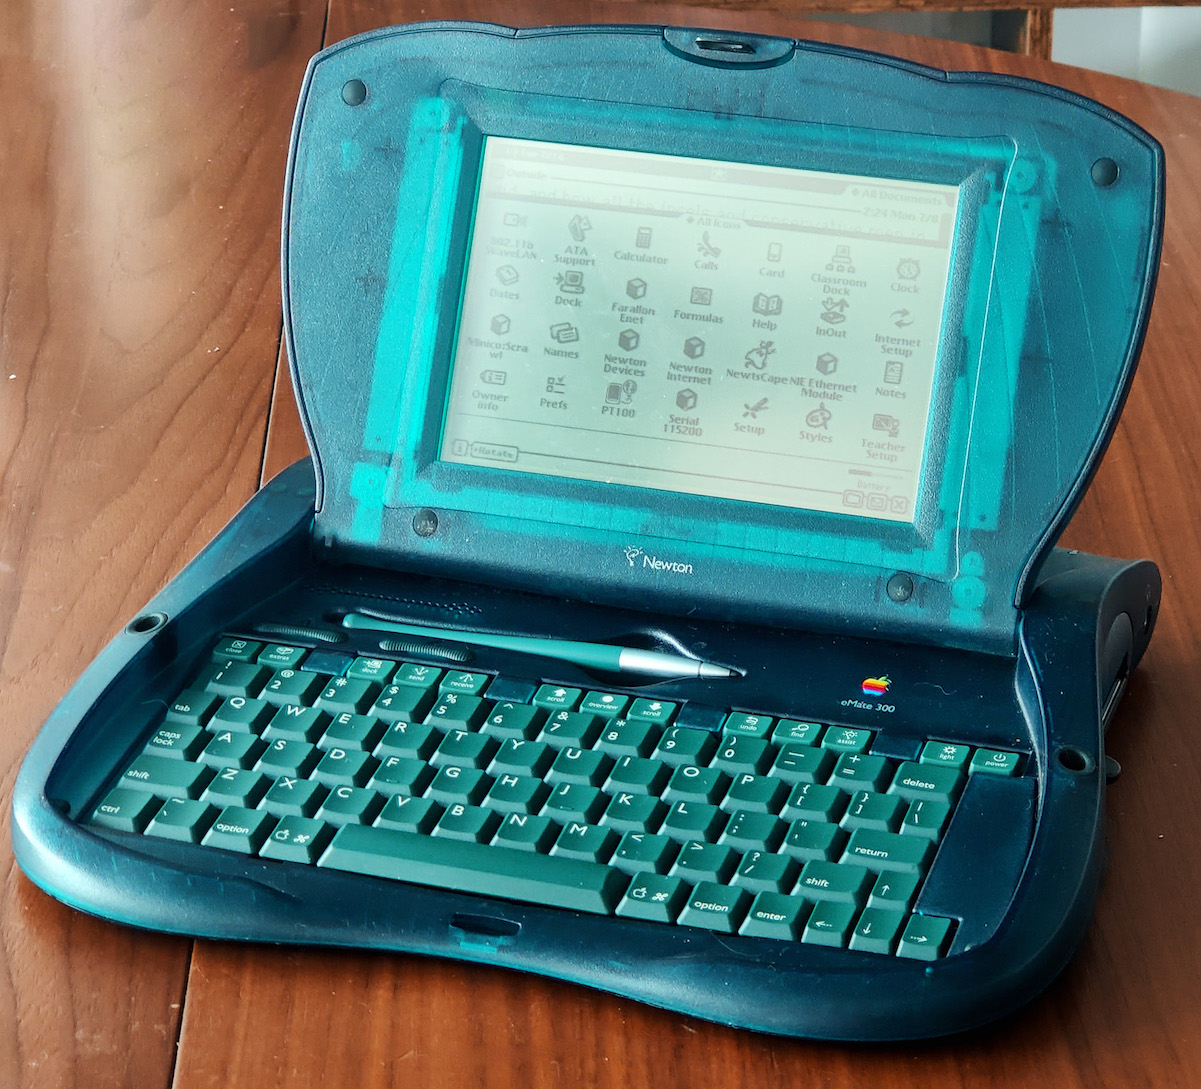
The Apple eMate 300 is a very weird little device. Its translucent design prefigures the Bondi Blue iMac that would be released a year after it, but it runs the Newton OS, the ill-fated operating system for the Newton series of PDAs, which in 1997, was mere months away from an unceremonious death. Its processor is considerably slower than the MessagePad 2000 that was released at the same time, but the eMate was much cheaper, and had a keyboard. Apple intended to target this cute plastic computer at the education market; this was far less successful than the company imagined, and it was thrown out along with the rest of the Newtons when Steve Jobs returned to Apple.
The battery pack
I love Apple’s weird little failures (and I hate Steve Jobs), so when I saw someone getting rid of a bunch of eMate 300s at VCFW for $30 a pop, I had to pick one up. Given these things are now over 25 years old, the batteries aren’t likely to hold much of a charge anymore. Mine worked for an hour or so without being plugged into the wall, far from the original battery pack’s 25 hours of life.
Thankfully, these are just boring Ni-Cd cells soldered together with a single thermistor to ensure they don’t overheat. The whole assembly is pretty straightforward, and replacing the worn out cells is easy.
To get started: make sure you buy 4 Ni-Cd cells, ideally ones with solder tabs. The original cells are 1000mAh a piece, though you can go higher than that if you can find better cells (the best I could find with solder tabs were 1000mAh, you might have more luck). You’ll also need some kapton / heat tape to hold the pack together when it’s done.
To perform the replacement, first, just take the Torx screws off from the bottom of the battery case on the unit. This will expose the battery and its case:
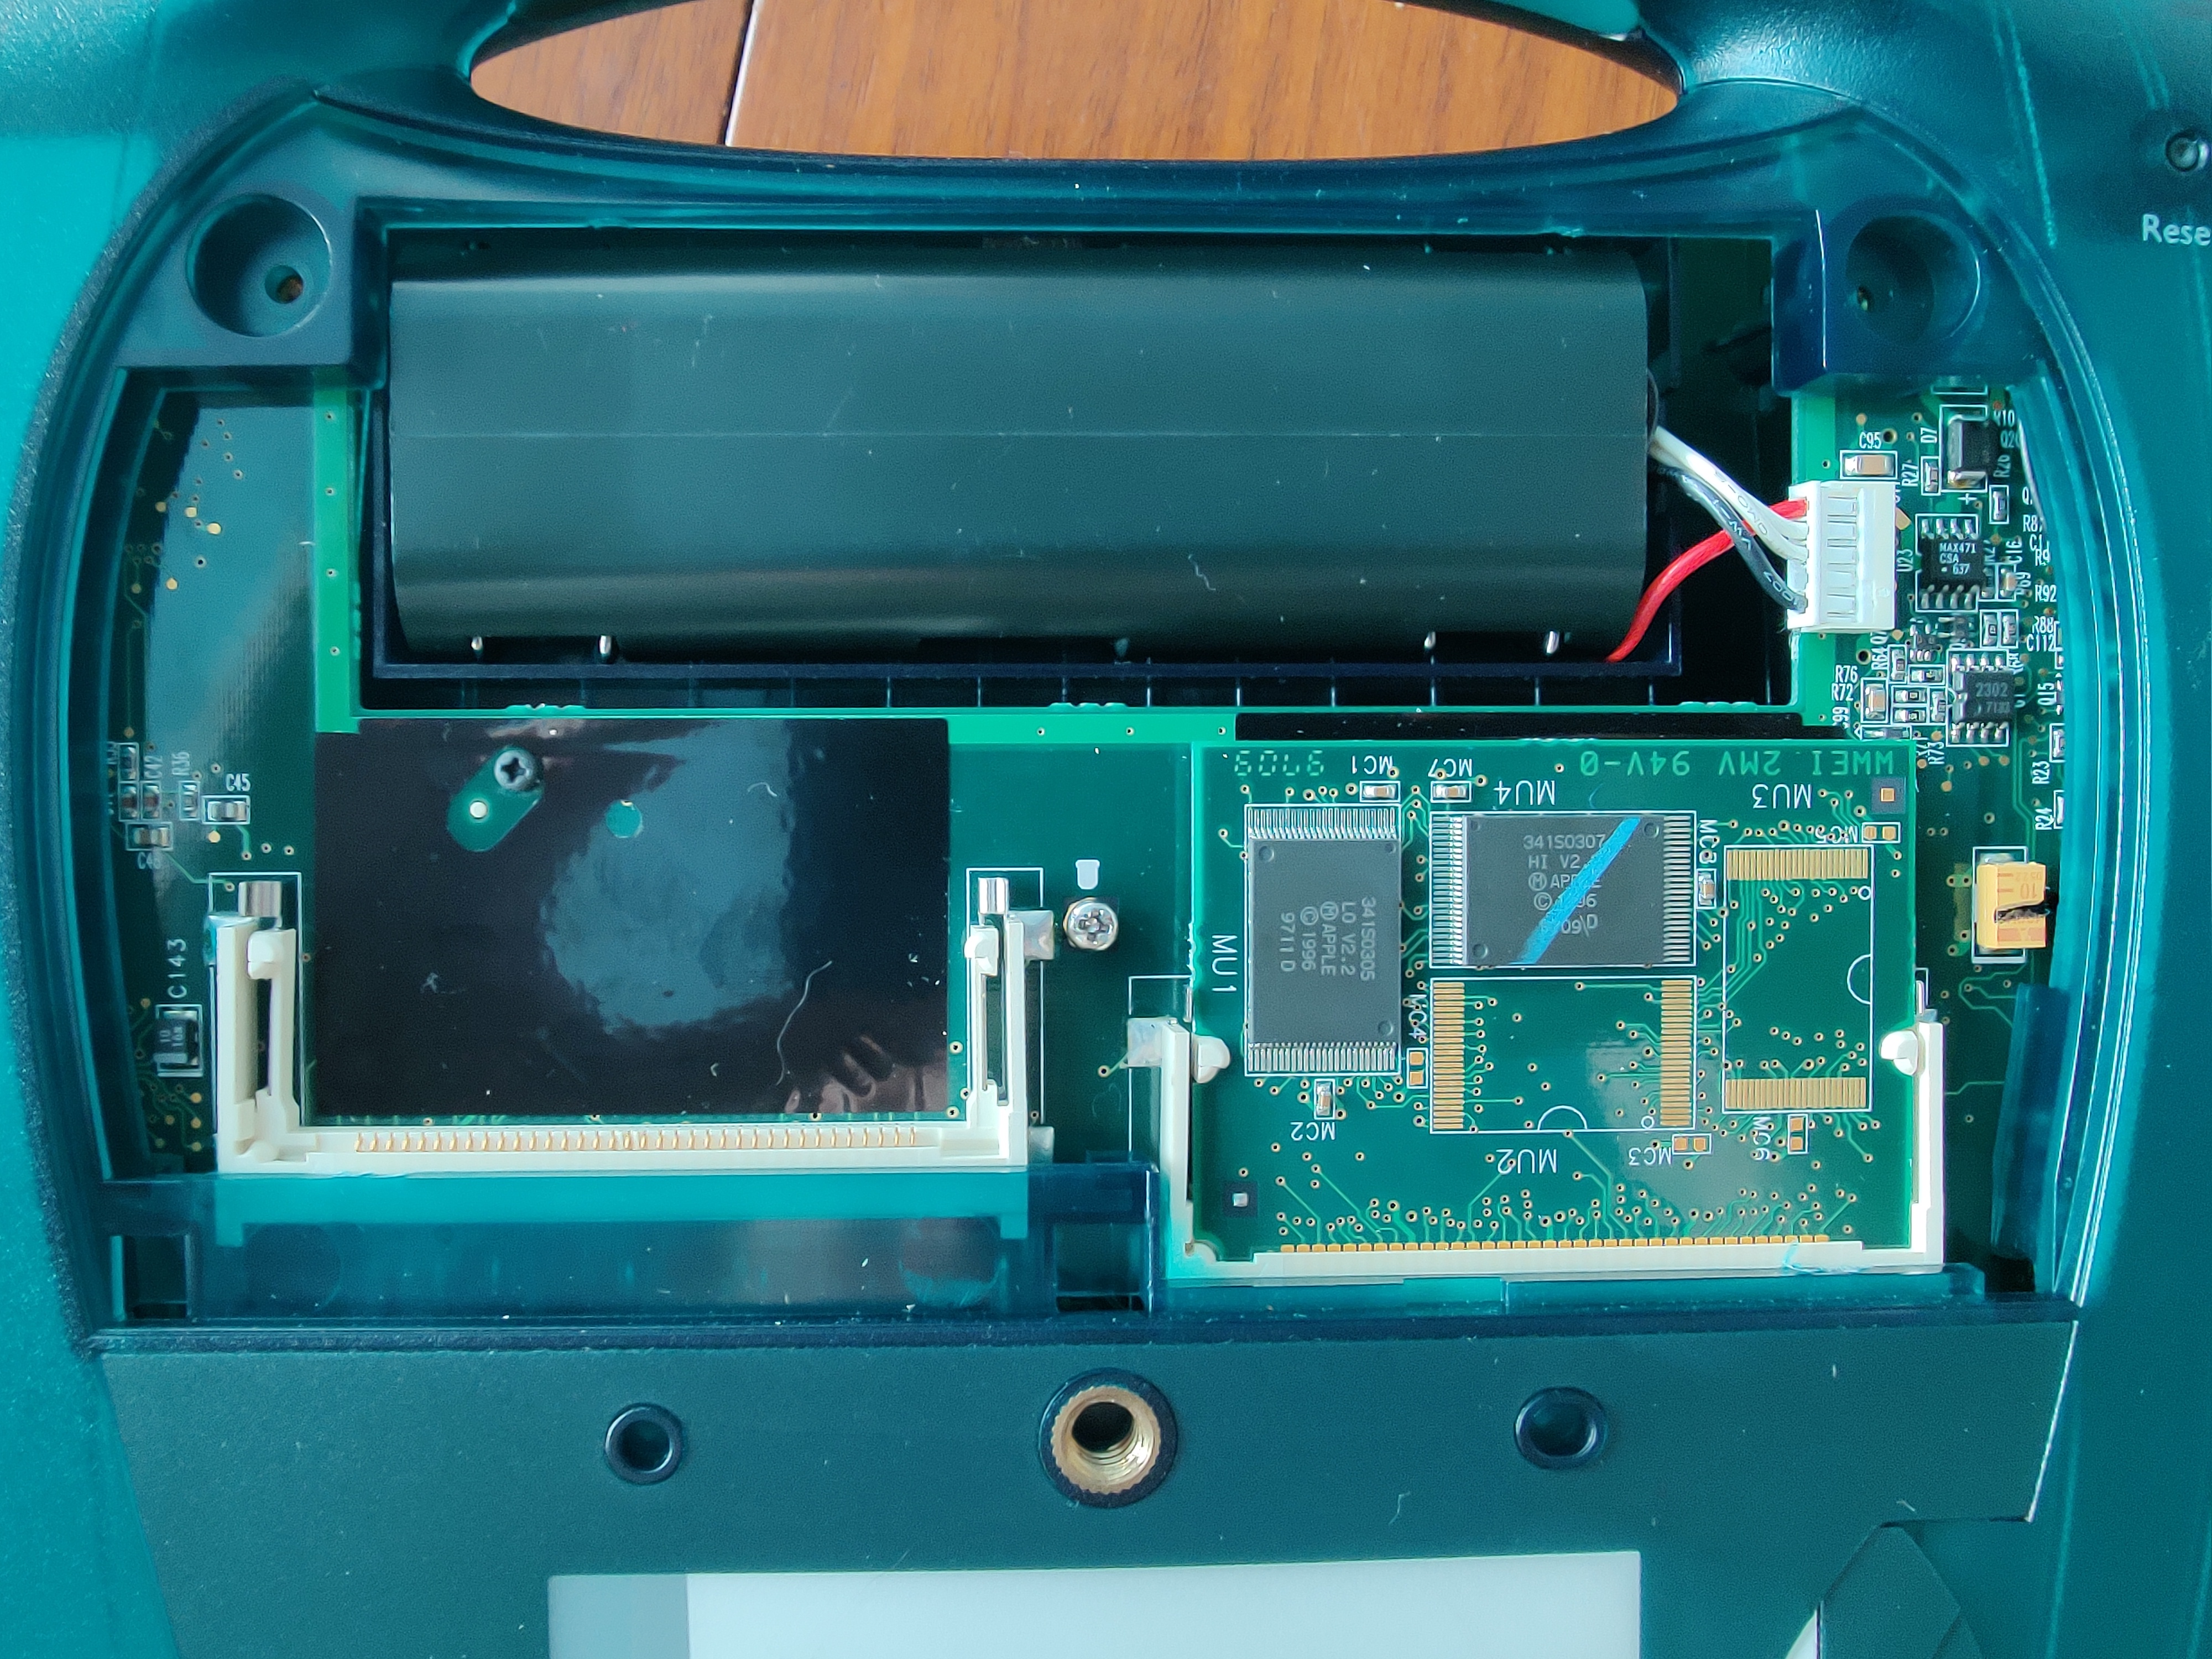
Next, disconnect the cable to the main board, and remove the black shell covering the battery pack. You can just slide it out by pressing on the bottom and forcing it out through the top.
Once you have the battery pack, cut into the tape that wraps the cells, taking care to not cut the wires to the thermistor connected to the cord that leads to the main board jack. Once this is complete, you’ll have the whole set of cells exposed, with the little thermistor wires soldered onto the top two cells and the thermistor itself nestled in the center between them. Take note of this; you’re going to basically be reassembling it just as-so.
Now, desolder the positive and negative wires from the main board jack onto the top cells. This jack has four wires on it: two go to the positive and negative terminals on the top cells, and two go to the thermistor. Keep the thermistor intact! You’ll just be reusing it with your new pack.
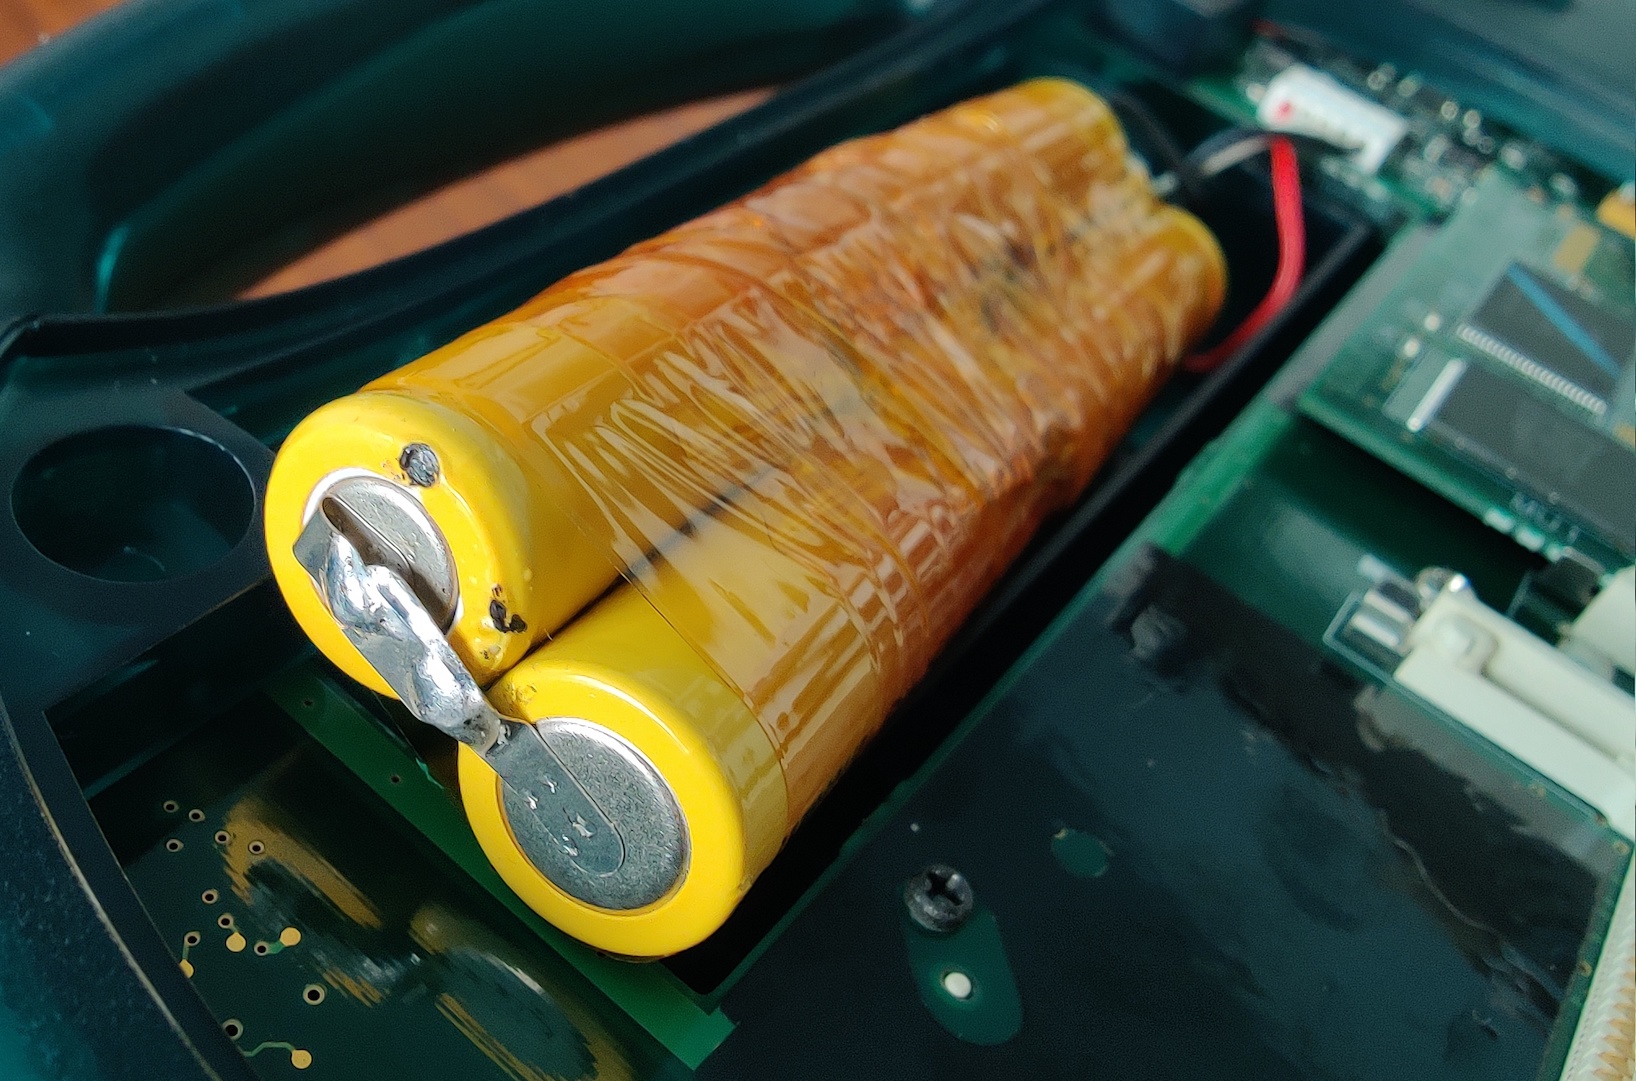
Take your new cells, and start soldering them together in series, making sure to note which side is negative and which is positive. Try to make sure the joints are solid here, but it doesn’t need to be pretty. Here’s an example of what my new battery pack looks like from the bottom:
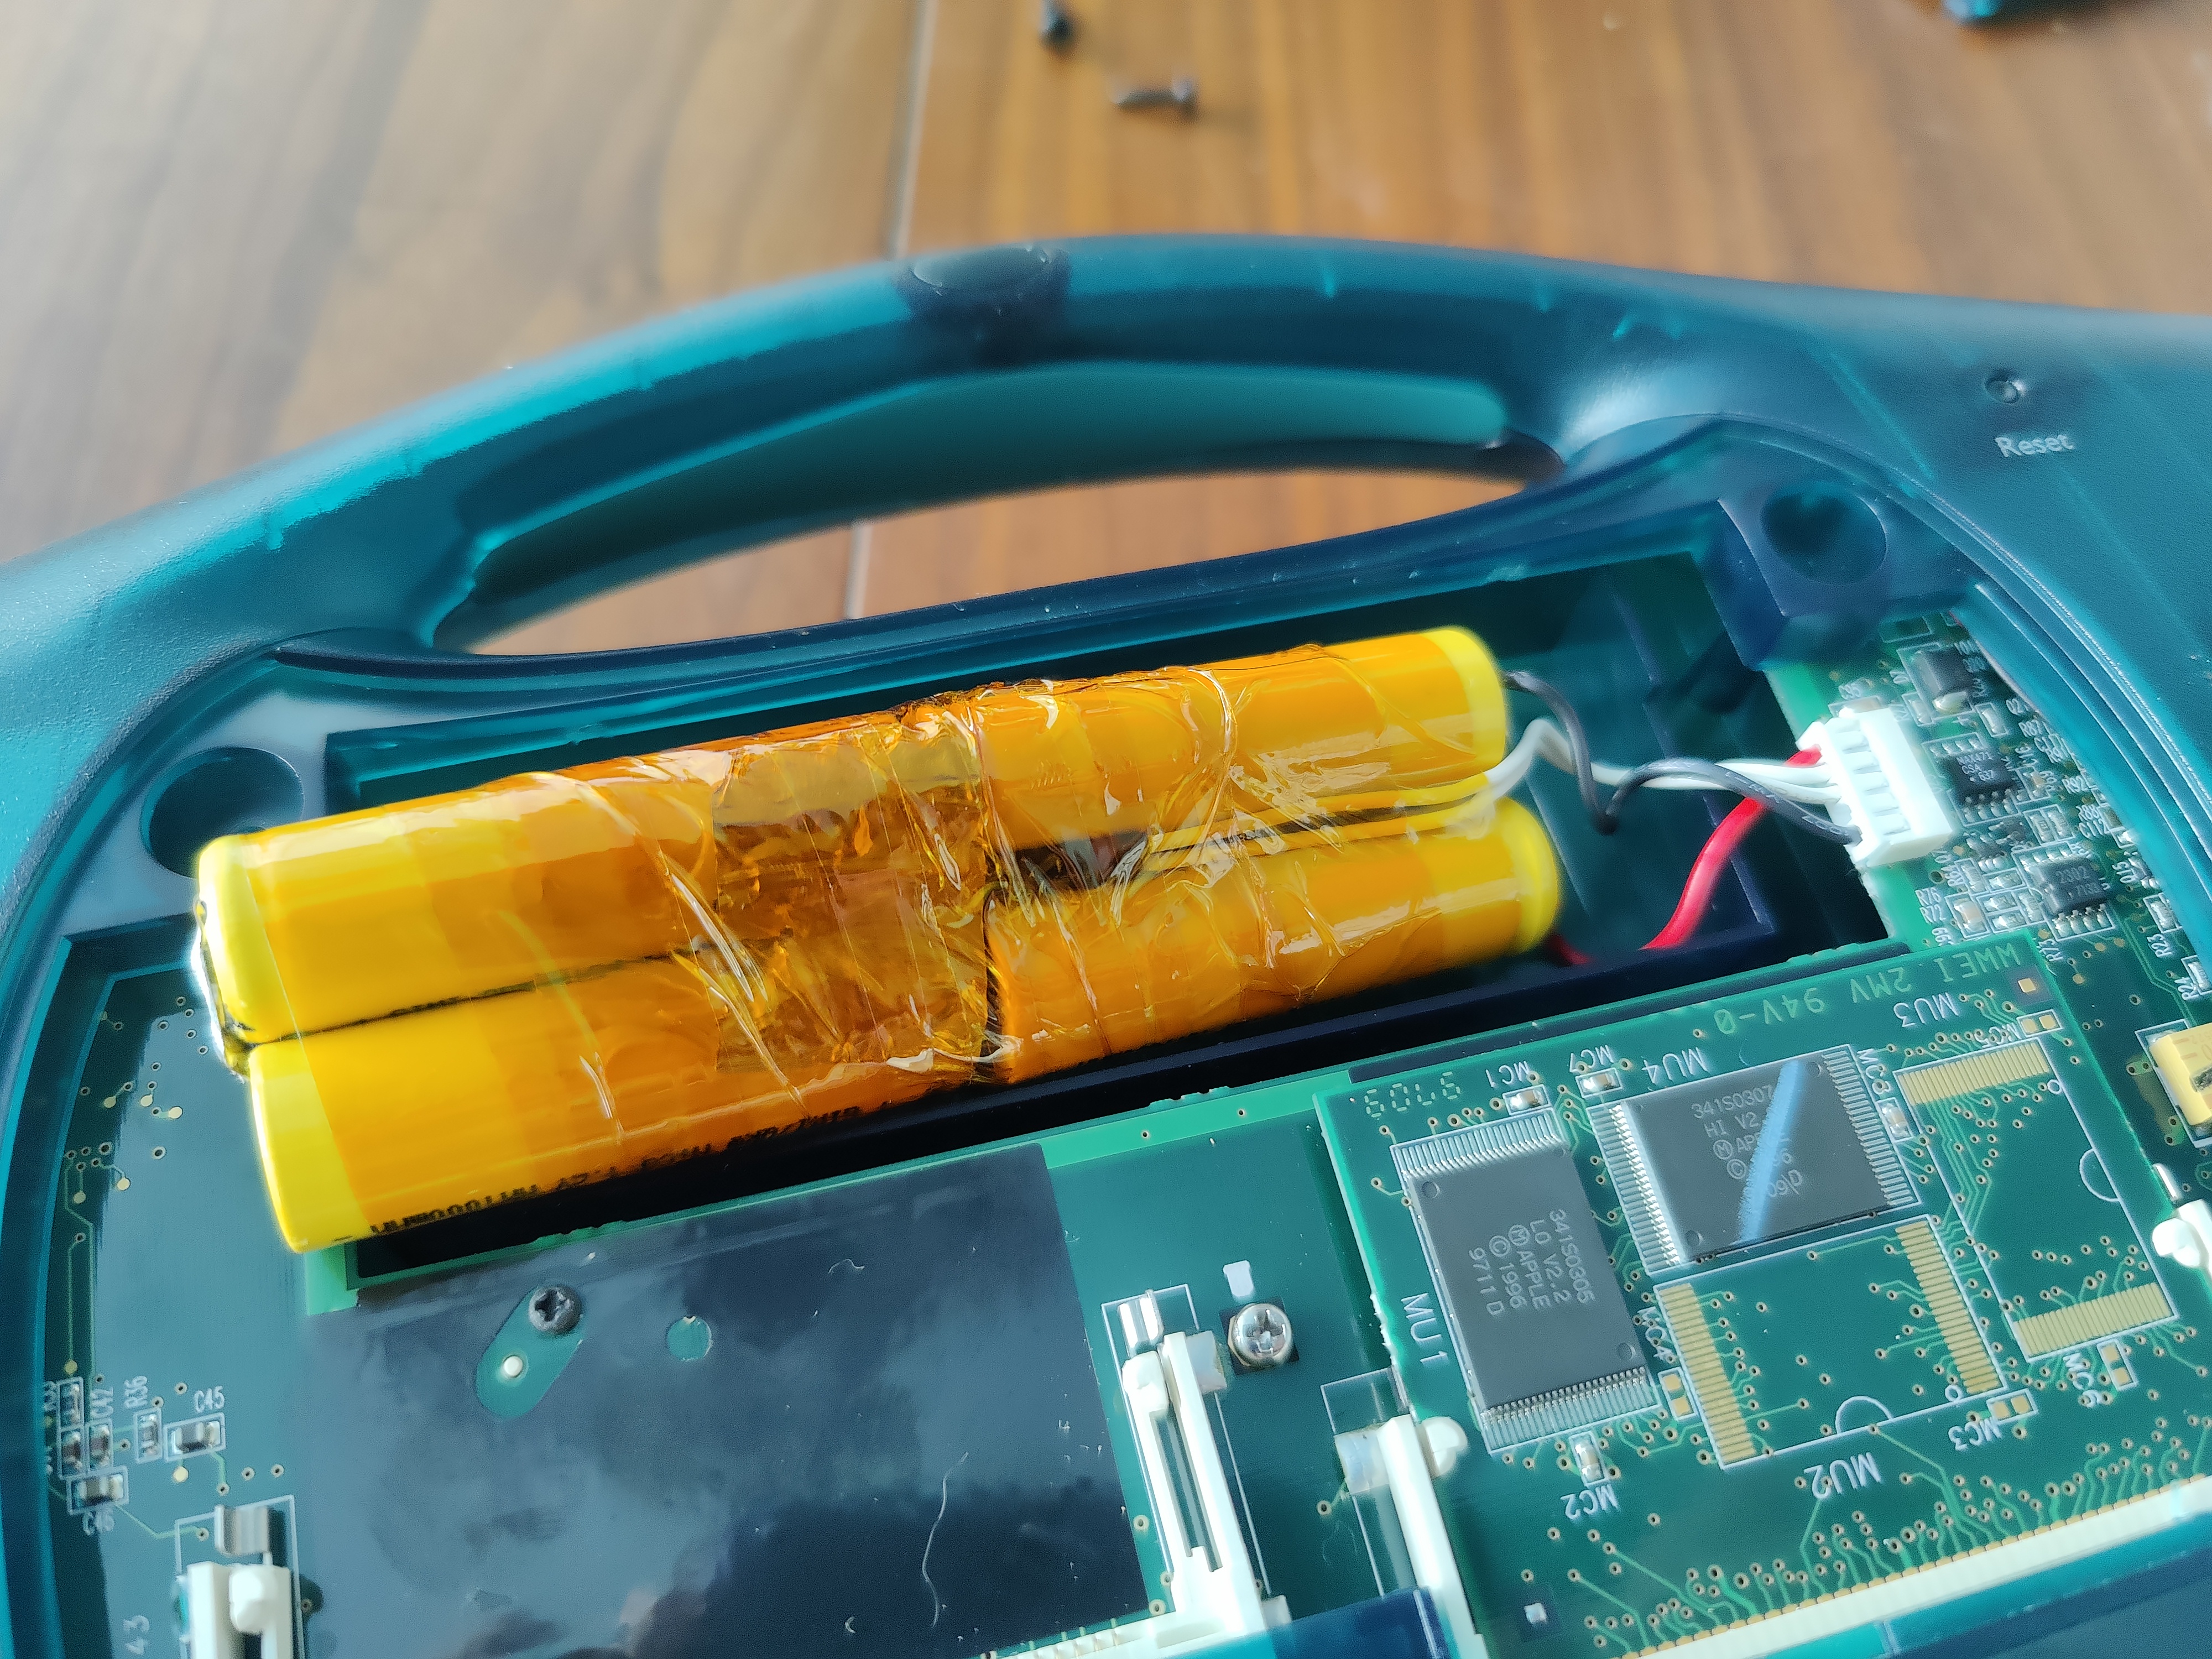
Once this is done, place the thermistor (and associated wires) in between the top two cells, reaching down to the start of the bottom two. Solder the positive wire to the top cell with its positive terminal exposed, and the negative wire to the top cell with its negative terminal exposed. After this is done, wrap the whole dang thing in a few layers of kapton tape. It should look something like this:
 .
.
Shove this whole assembly into the black plastic cover, put the cover back on, plug in the power, and let it charge before using it.
There’s a lot that’s been written about Ni-Cd cells and a memory effect, but the gist of it seems to be that it’s not a huge deal. When I charged mine, I tried to get a full charge / discharge cycle in before half-way charging, but this is probably not a serious concern.
One thing that is a serious concern though is charge voltage. The eMate 300 lists its input voltage as 7.5v; unless you have a high-quality 7.5v power supply, or the original Newton 9W adapter, the eMate 300 will probably report a charge fault at 7.5v. It’s exceedingly picky about power adapters. If this happens, it’s not because you did anything wrong assembling the power pack. Instead, try charging with a 6v adapter. It takes longer, but I’ve found it’s a lot more tolerant of the lower voltage.
The hinge
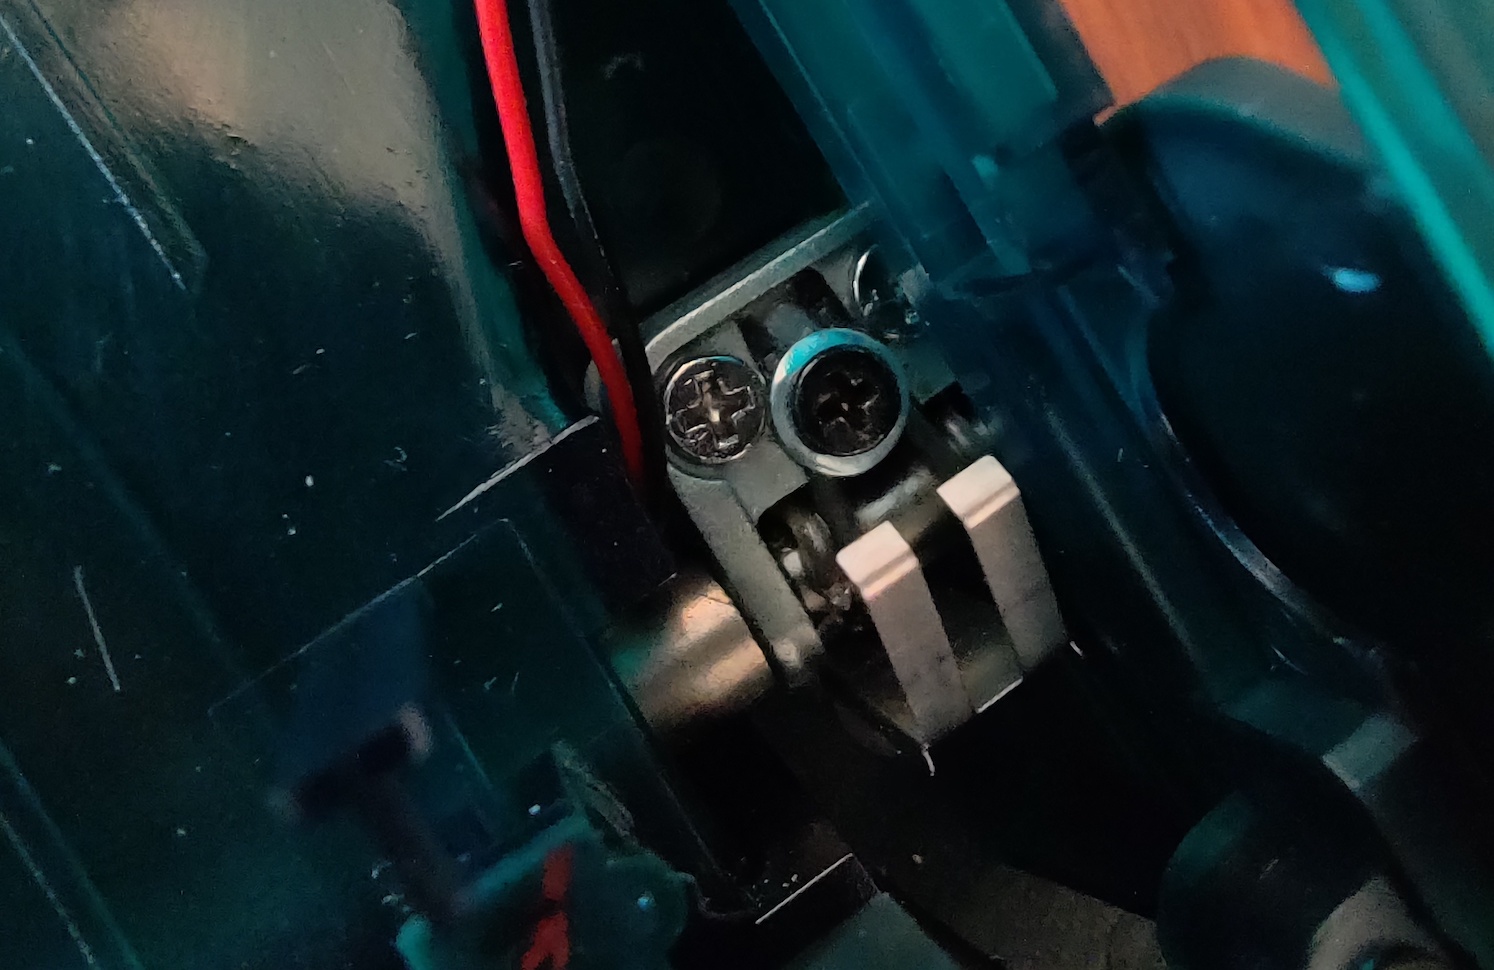
Now that you’ve got a working eMate 300 that can run off batteries, you’re good to go, right? Well, no, not really. Apple made these things with a pretty frustrating design flaw that can render it useless unless you take steps to correct it. Essentially, the hinges that hold the display to the eMate 300’s body are, over time, likely to slip out and tear up the ribbon cable that connects the display. The solution is to just throw a washer on the hinge so it can’t pop out.
There’s plenty of information out there about eMate 300 hinge repair, so I don’t feel the need to go into detail here; it’s a bit annoying to do (you have to desolder connections to the main board that could have very easily just been a plug), but it’s really not too bad. One thing that I will point out is that the guide everyone uses, that I linked above, describes using 10mm washers with a hole diameter of 3.4mm. I couldn’t find these at my local hardware store, so I just went with 3mm washers, that had significantly less of an overall diameter. They worked fine; just make sure they cover the little spots where the hinge spring can come out:
 .
.
And don’t worry if your ribbon cable has already been destroyed; Androda sells spares.
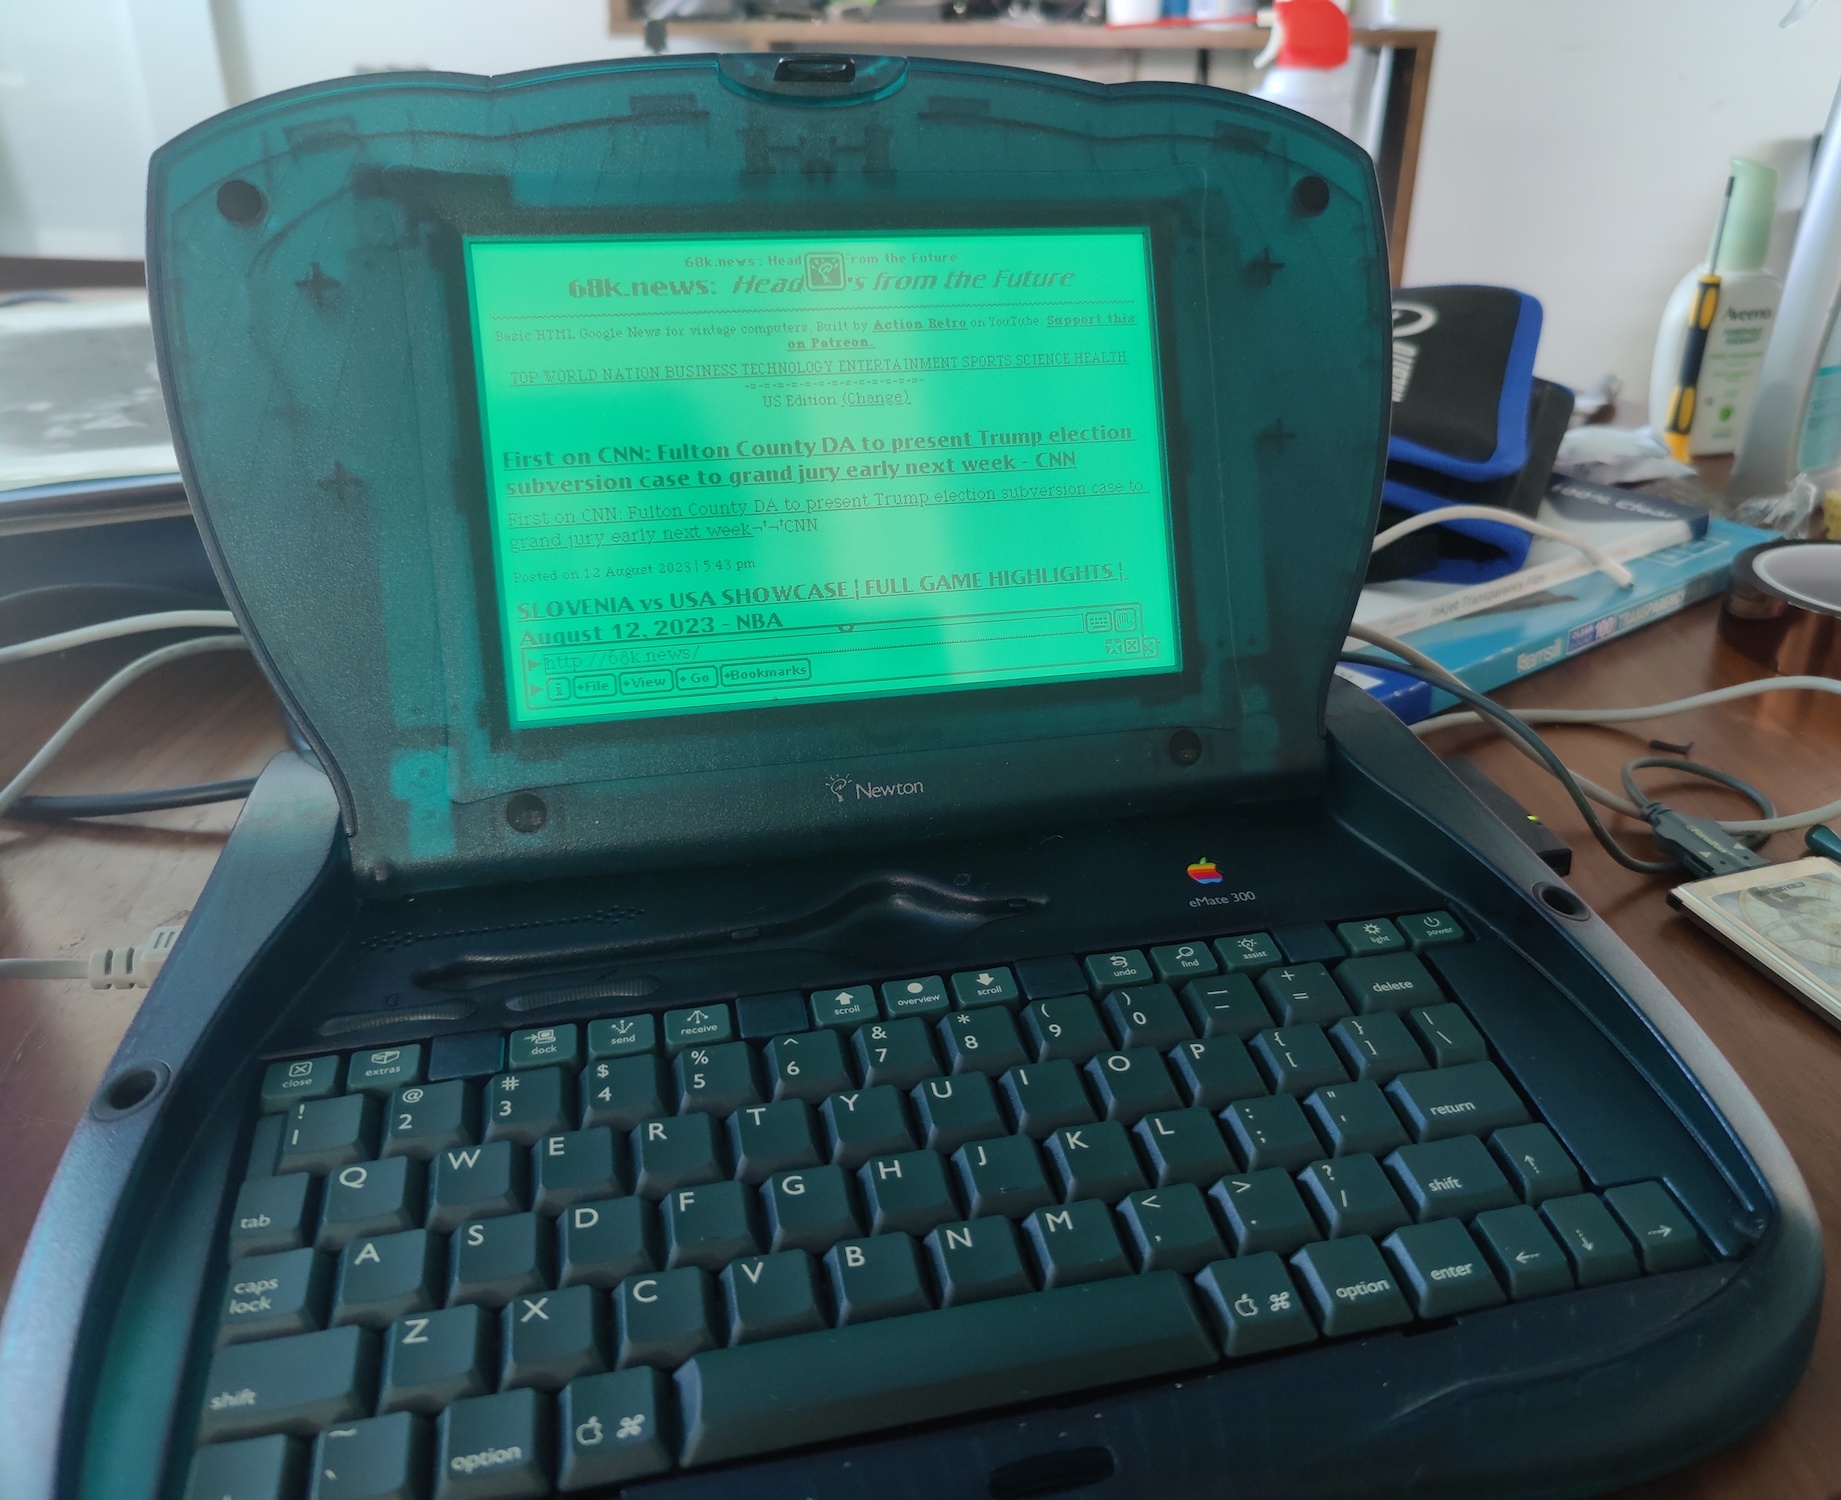
Once all this is done, you have an eMate 300 that should work for years to come! I love this little thing; it’s fun to take it somewhere for distraction-free writing. There’s a terminal client for it (serial number generator here), so you can use it as a connected terminal for your laptop, and there’s even wifi drivers (for a small number of wifi cards). Don’t expect much out of web browsing on this thing, but it does work:
 .
.
Enjoy! Hope this helps everyone keep their Newtons alive for a few more years.